
Create Your First Shopify–Airtable Sync
A sync defines the bridge between your Shopify store and an Airtable base: which direction data flows, which data types are included, and how Shopify fields map to Airtable columns. AirPower runs the sync on a schedule or on demand and keeps the two sides in step.
This guide walks through creating your first sync end to end. You will pick where your Shopify data lives in Airtable, connect your accounts, configure the data and fields, and run the first import.
Step 1: Open the New sync wizard
- Go to the AirPower dashboard
- Click New sync
The wizard opens and asks “Where will your Shopify data live in Airtable?”
Step 2: Choose a setup path
Pick one path card.
Create a new base for me (Easiest) AirPower creates a ready-to-use Airtable base in your workspace and configures the sync automatically. Requires your Airtable workspace ID and broader workspace access on your Personal Access Token (see Step 3).
Use one of our template bases Copy a free AirPower template into Airtable, then connect the copied base. AirPower detects the template and pre-fills the sync settings automatically. See Template starter bases for the available templates and the full copy flow.
I already have an Airtable base Connect an existing base. AirPower reads its tables and columns so you can map Shopify fields to them manually.
Click your choice to continue.
Step 3: Connect Airtable
If Airtable is already connected from a previous sync, this step is skipped. The wizard goes straight to Workspace (for the create-new-base path) or Pick base (for the other two paths).
Otherwise, the Connect step opens. There are two ways to connect: a Personal Access Token (PAT) or the Airtable Connect flow. PAT is recommended because it is not revoked during Airtable service issues, so your syncs keep running.
Connect with a Personal Access Token
If you have not created a token yet, see How to Create an Airtable Personal Access Token.
When creating the token, enable these scopes:
data.records:readdata.records:writeschema.bases:readschema.bases:write
Under Access, choose the workspace you want to sync to. If you chose Create a new base for me in Step 2, set the workspace access to All current and future bases in this workspace. This is required for AirPower to create a base on your behalf.
Then in the wizard:
- Paste your token into the Personal Access Token field
- Click Connect (or Continue if you chose Create a new base for me)
AirPower loads the Airtable bases the token has access to.
Connect with Airtable Connect
To authorize through Airtable Connect instead, click Use the Airtable Connect flow instead. The Authorize via Airtable Connect screen opens with an Open Airtable to authorize button that takes you to Airtable to approve access.
If you chose Create a new base for me in Step 2, grant access to All current and future bases in this workspace on Airtable’s authorization screen, in the workspace where AirPower should create the base. Without that access, base creation will fail.
Step 4: Finish the setup path
Create a new base for me
After Airtable is connected, the Workspace step opens with the prompt “Where should AirPower create your base?”
- Paste your Airtable workspace ID into the Airtable workspace ID field
- Click Create base
See Find Your Airtable Workspace ID for where to find it.
Setup takes about 10 seconds. AirPower creates a base named “[Your store] Shopify Sync” in your workspace, adds the default tables and columns, and opens the sync editor with the base preselected as a Shopify → Airtable sync.
Use one of our template bases
Follow Template starter bases to copy the template into Airtable. After you return and click I’ve added the template - Continue, the Pick base step opens. Select the copied base and click Use this base - Continue.
The sync editor opens with the template base preselected. AirPower fills in the default field mappings automatically.
I already have an Airtable base
After Airtable is connected, the Pick base step opens.
- Select the Airtable base
- Click Use this base - Continue
The sync editor opens with the base preselected.
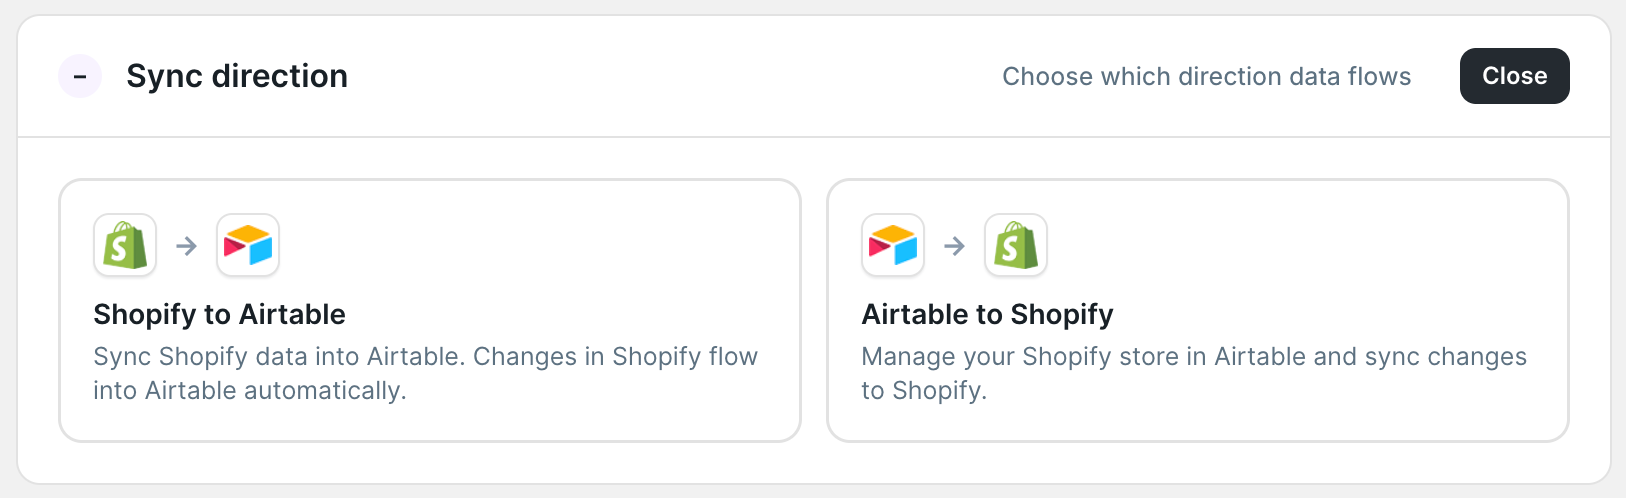
Step 5: Choose a sync direction
In the sync editor, open Direction and choose one:
Shopify → Airtable Shopify pushes changes to Airtable automatically. Use this to keep an Airtable view of your Shopify store.
Airtable → Shopify You edit records in Airtable and trigger a sync to push the changes to Shopify. Use this for bulk edits.
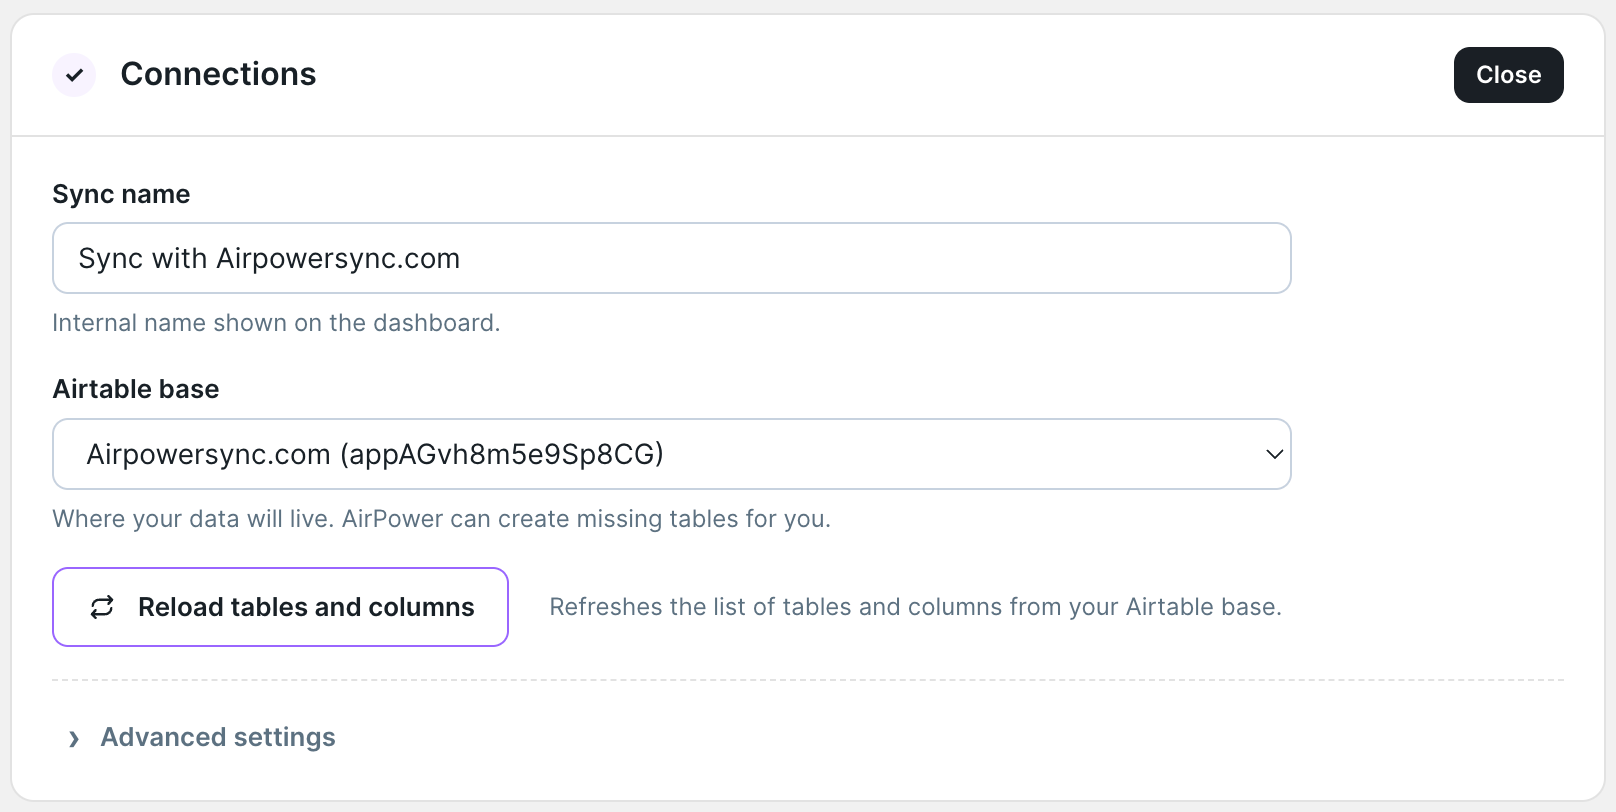
Step 6: Confirm your connections
Open Connections and verify that the correct Shopify store and Airtable base are selected. AirPower reads the base structure, including tables, columns, and views, and makes it available in the next step.
Step 7: Configure Data & fields
Open Data & fields. This is where you choose which Shopify data types to sync and map them to Airtable.
- Click a data type, for example, Products
- Select the Airtable table to sync to or from
- In the Main Fields pane, map the Shopify fields you want to the corresponding Airtable columns
- Repeat for any additional data types you want to include
If a required table or column does not exist in your base, use the Create table or column creation options to add them directly from the editor.
Step 8: Save the sync
Click Save sync. AirPower saves the configuration and the sync becomes active.
The first time you save a Shopify → Airtable sync, AirPower asks whether to start an initial download of your existing Shopify records into Airtable. Without that download, only changes made in Shopify from this point forward will flow into Airtable.
Step 9: Run your first sync
For Shopify → Airtable syncs: Click Import from Shopify in the post-save prompt to download your existing Shopify records into Airtable. AirPower queues a one-time download for all configured data types.
For Airtable → Shopify syncs: Click Sync Airtable to Shopify to push your Airtable rows to Shopify immediately.
Click Not now to skip the initial run. You can start the sync later from the dashboard.
After queueing the first run, click Go to dashboard to track progress.
Step 10: Return to the dashboard
Use the back button to return to the dashboard if you skipped the initial run. Your new sync appears as a dashboard sync card.
What you’ll see after saving
The dashboard sync card shows:
- The sync name
- The connected Shopify store and Airtable base
- Sync stats once the first sync run completes
- A Sync now button (Airtable → Shopify) or a schedule/status line (Shopify → Airtable)