
Bulk Edit Shopify Metaobjects with Airtable
In Shopify, metaobjects store structured custom data outside of standard objects like products and customers. Each metaobject definition has its own set of fields, and stores use them for size guides, ingredient lists, store locations, ratings, FAQ entries, and other reusable content.
Managing metaobject entries in the Shopify admin means opening the metaobject editor, navigating to a definition, and editing entries one at a time. There is no built-in surface for reviewing or bulk-editing a full set.
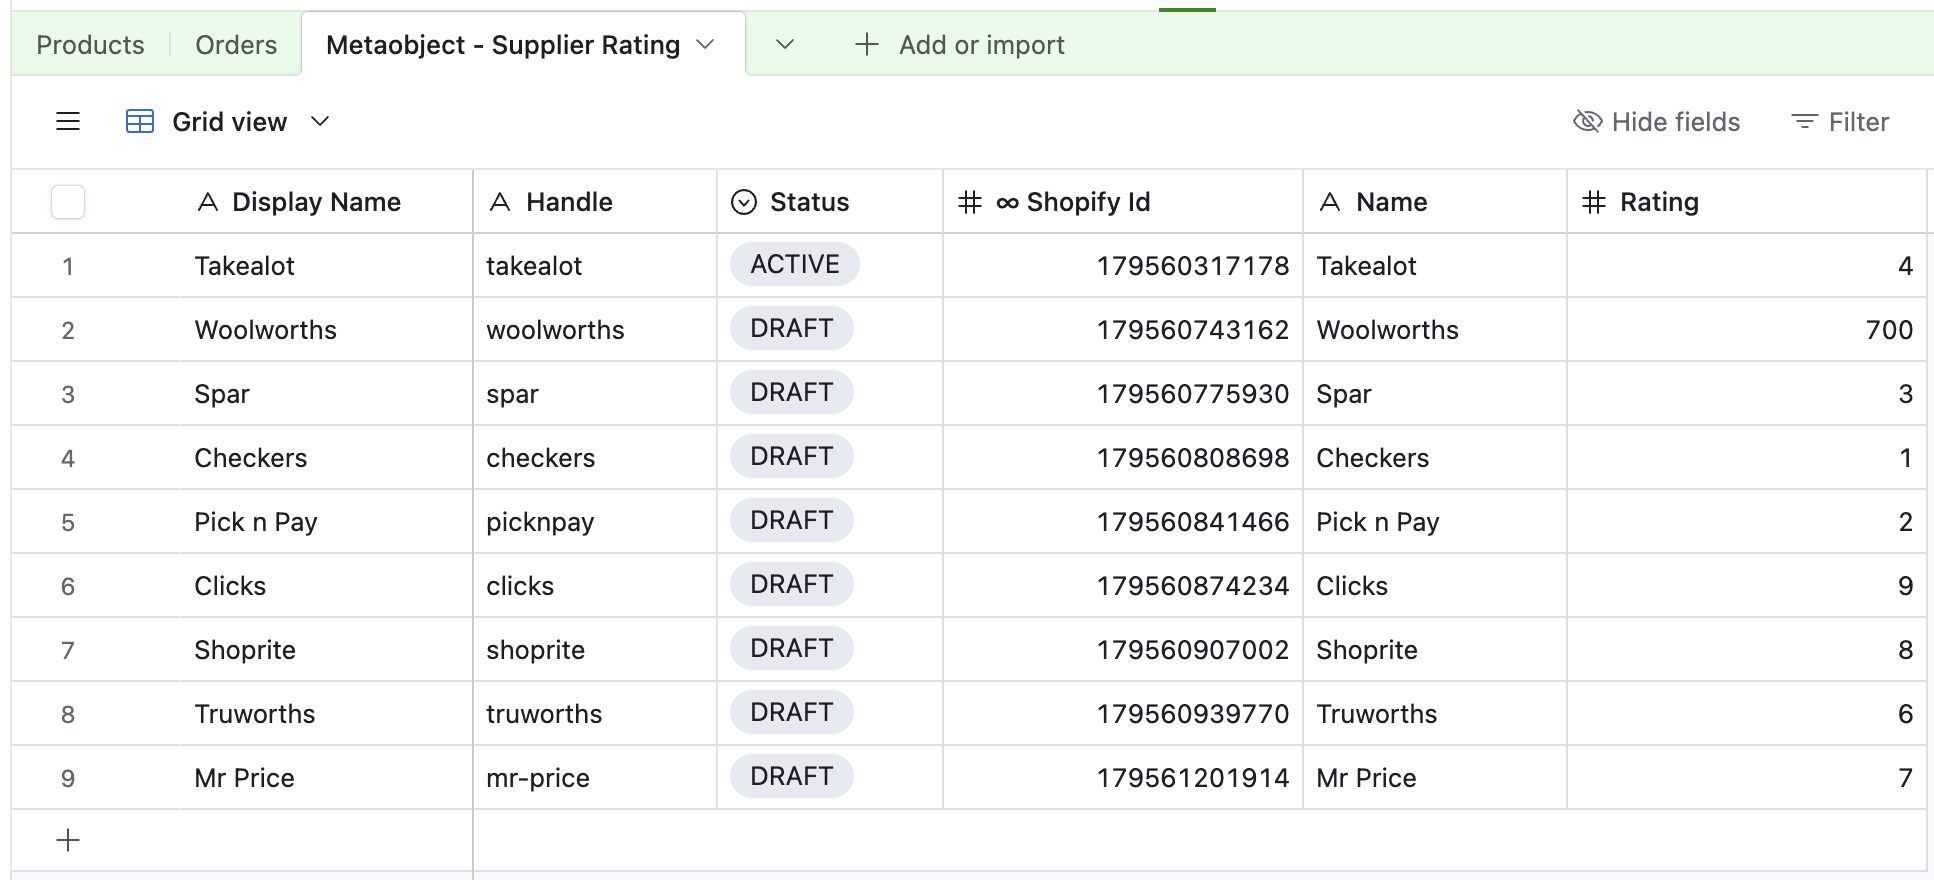
AirPower syncs each metaobject definition to its own Airtable table. Entries appear as rows with the definition’s fields as columns. Edit values, create new entries, and push changes back to Shopify. New entries get their Shopify ID written back to the row automatically.
Available metaobject types
The metaobject types available in AirPower depend on what is defined in your Shopify store. When you connect a Shopify store, AirPower loads your metaobject definitions automatically. Each definition appears as a selectable type in the Metaobjects section under Data & fields.
Each metaobject type maps to its own Airtable table. If your store has no metaobject definitions, no types will appear.
Sync metaobjects from Shopify to Airtable
- Open a Shopify → Airtable sync or create a new one
- In Connections, select your Airtable base
- Go to Data & fields
- Click Metaobjects
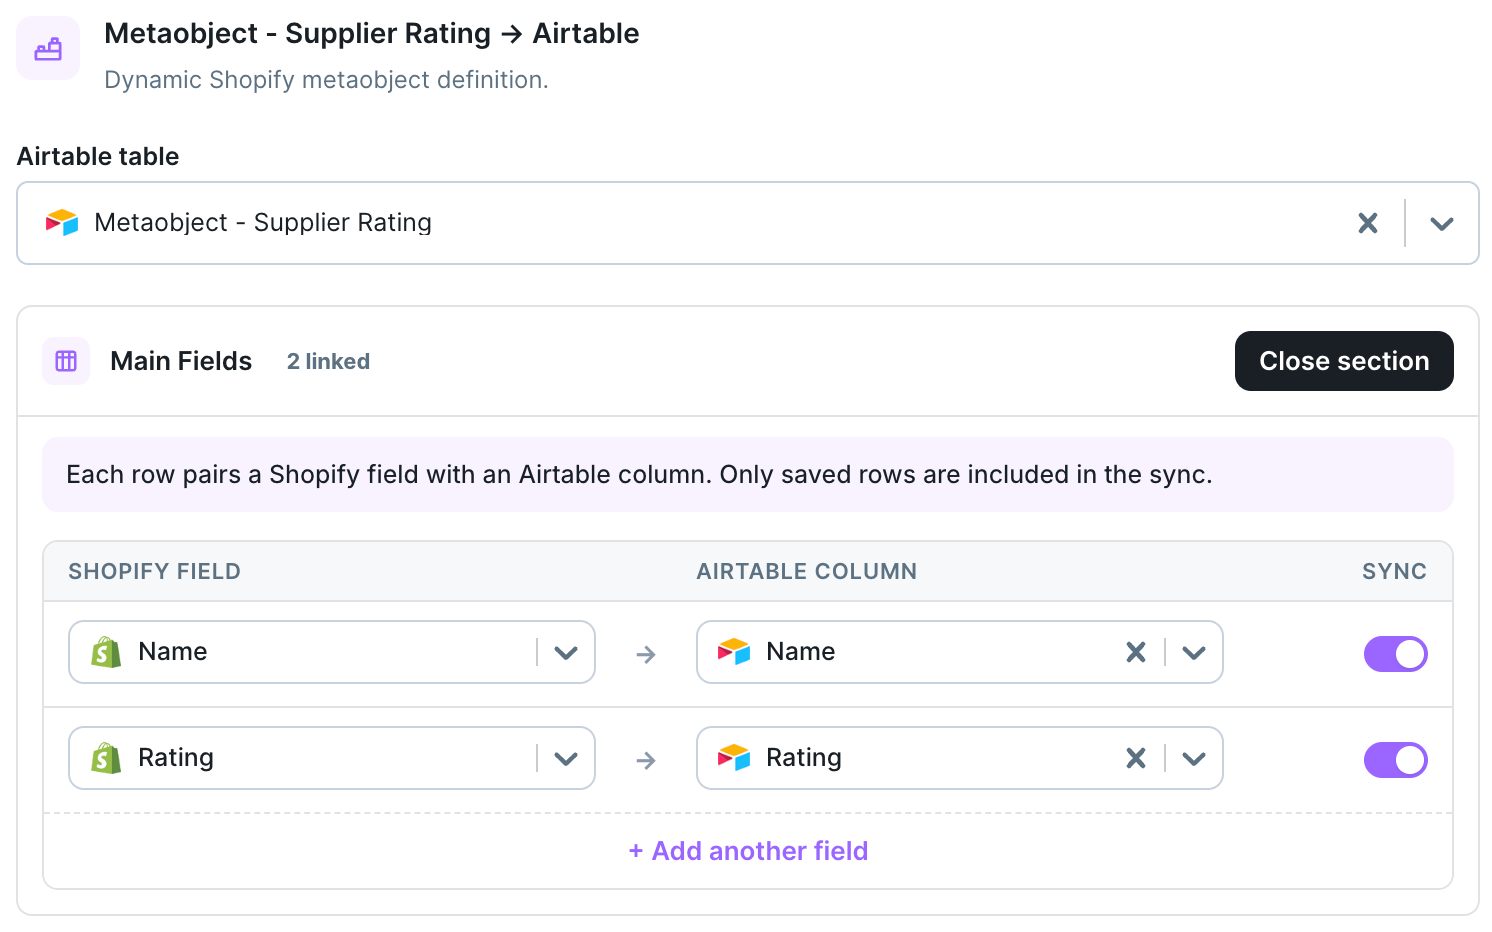
- Select the Airtable table to sync to, or type a new table name. AirPower can create the table with the recommended columns.
- Open the Main Fields pane and map the metaobject fields you want to sync
- Click Save sync
After saving, AirPower may prompt you to load your existing metaobject entries immediately. If you skip that prompt, load them later:
- Scroll to Settings
- Click Download Shopify data
- Find Metaobjects and click Download
Automatic updates from Shopify
When the sync is running, Shopify metaobject changes are reflected in Airtable automatically. New metaobject instances created in Shopify appear as new rows.
Edit metaobject entries and sync changes back to Shopify
- Open the Airtable → Shopify sync
- In Connections, select your Airtable base
- Go to Data & fields
- Click Metaobjects
- Select the Airtable table that contains the metaobject records
- Open the Main Fields pane and map the fields you want to write back
- Click Save sync
- Click Sync now on the dashboard sync card
AirPower reads each row in the table and updates the corresponding metaobject instance in Shopify.
Create new metaobject instances from Airtable
- Add a new row in your Airtable metaobject table
- Fill in the required fields. Leave the Shopify ID column blank.
- Click Sync now on the dashboard sync card
AirPower creates a new Shopify metaobject instance. Shopify assigns it an ID, which AirPower writes back to the Airtable row automatically.