You can set your Airtable → Shopify syncs to run automatically on a schedule, or keep them manual-only. Either way, you can always start a sync manually whenever you need to.
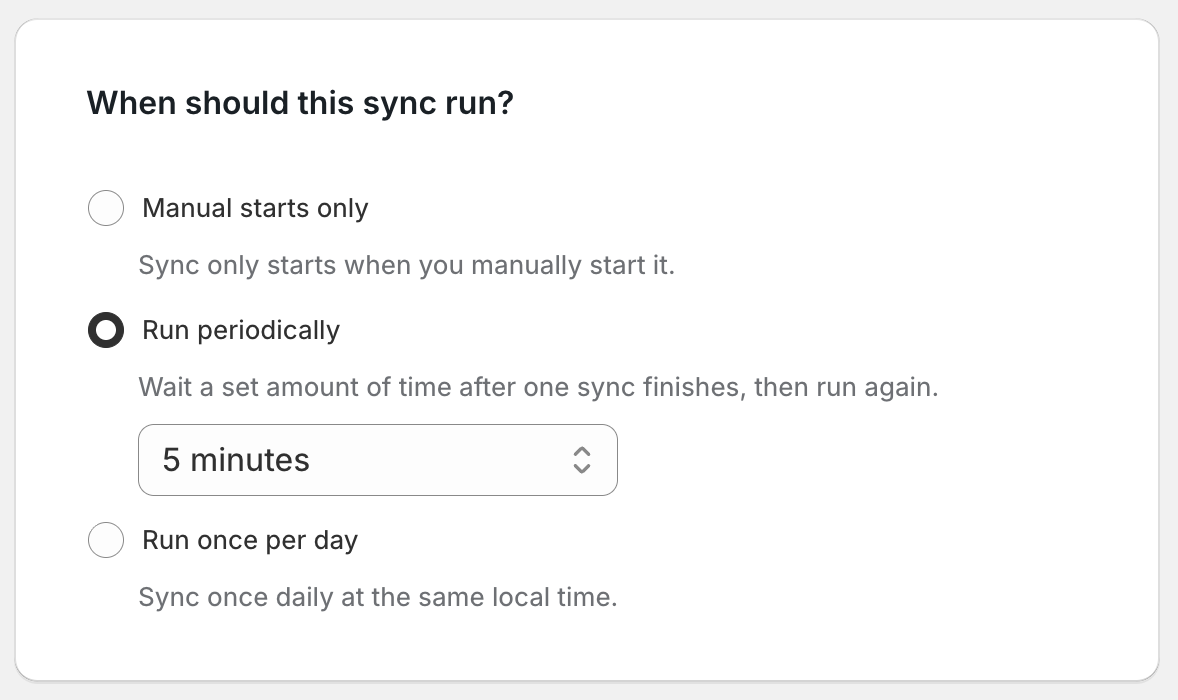
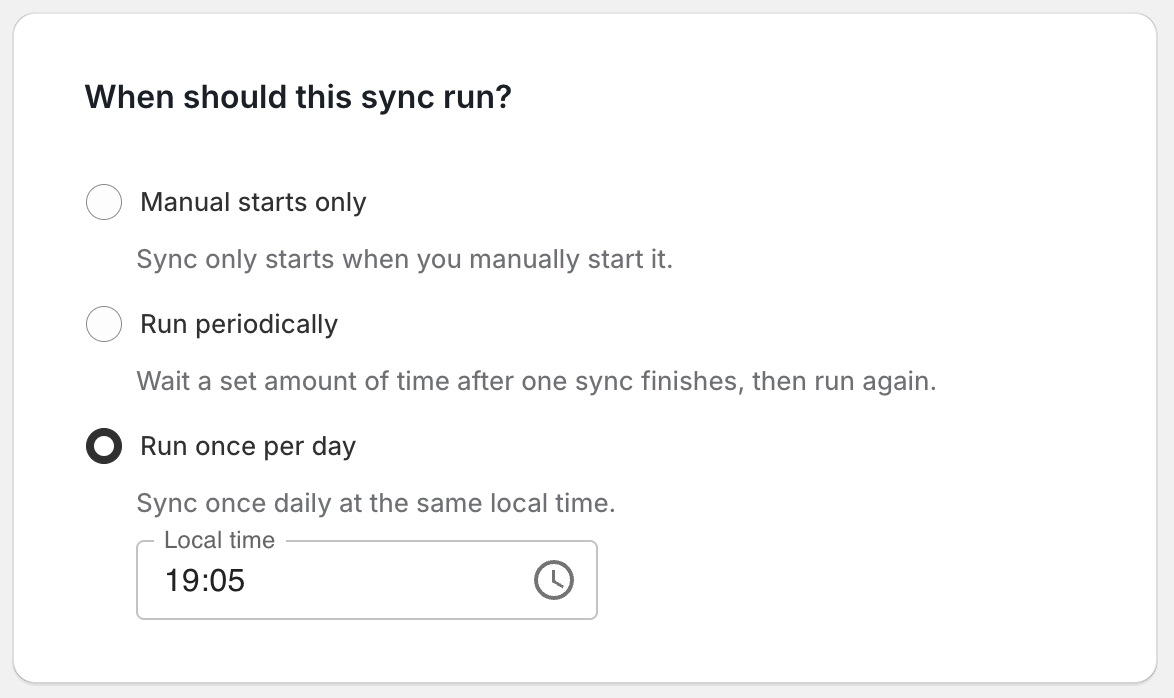
In the When should this sync run? section, you’ll see three options:
Manual starts only
The sync only runs when you click Start Airtable to Shopify sync on the dashboard. Choose this if you want complete control over when your data syncs.
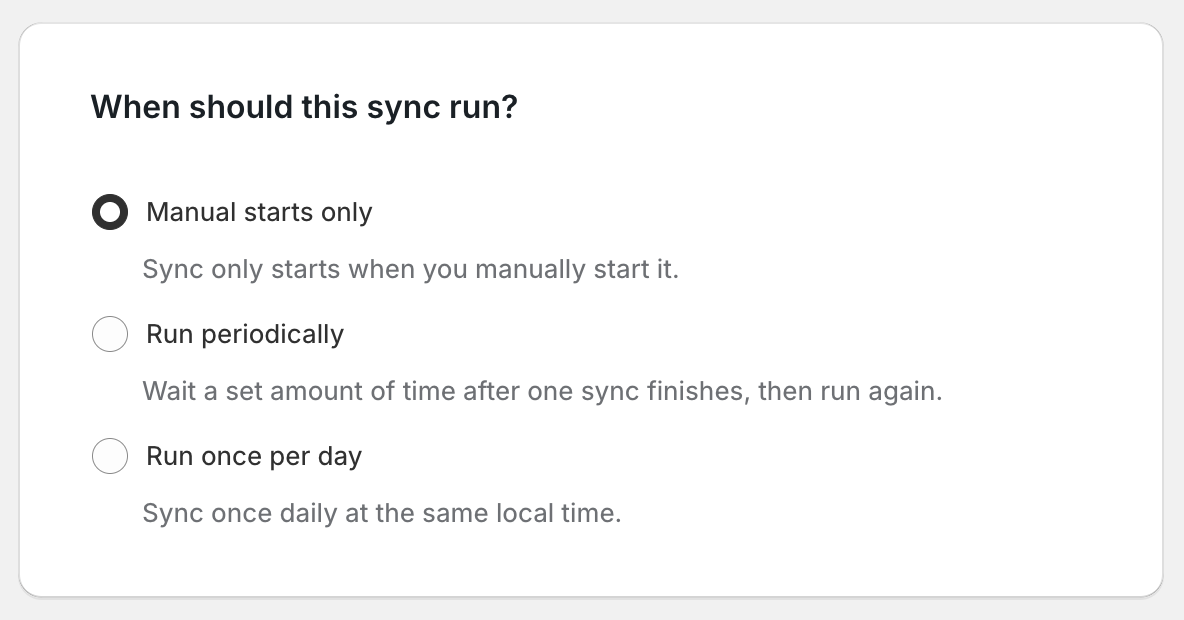
Run periodically
The sync runs automatically at regular intervals. After one sync finishes, you’ll set how long to wait before starting the next one. You can choose short intervals (like every 1, 5, or 10 minutes) or longer intervals (hourly or more).
Run once per day
The sync runs automatically once every day at the time you choose. Select the time based on your local timezone.
After making your selection, click Save Sync.
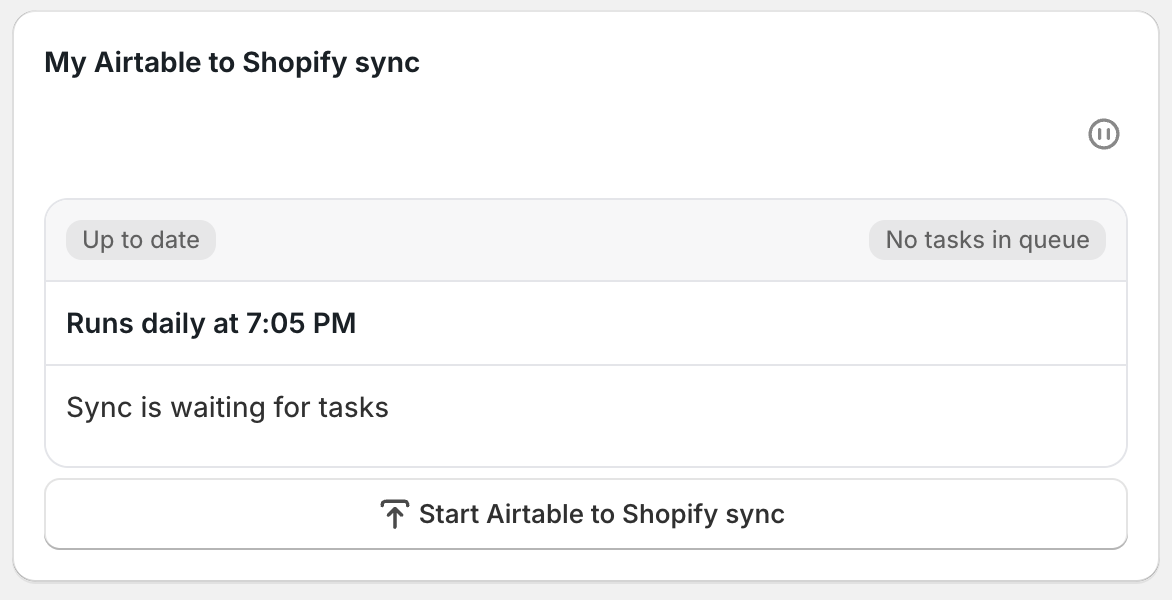
Even if you’ve set up an automatic schedule, you can still start a sync manually at any time. Just click Start Airtable to Shopify sync on the dashboard sync card.
Once you’ve set a schedule, head back to your dashboard. On your dashboard sync card, you’ll now see your schedule displayed (like “Every 10 minutes” or “Daily at 3:00 PM”). For scheduled syncs, you’ll also see when the Next run is planned. This makes it easy to confirm everything is set up the way you want it.