Looking to use a CRM to better manage your Shopify store and increase sales? Thinking of using Airtable for the job? You’ve come to the right place. We’ve written this guide to share the best ways our clients use their Airtable-powered CRMs to grow their Shopify stores. We’ll show you how to set things up and what you can achieve.
A Customer Relationship Management (CRM) system helps you manage your customer data and use it to grow your business. A CRM keeps customer information up to date, tracks customer interactions, shares data with colleagues, and helps you learn from customer behavior. It’s designed to improve customer relationships and increase Customer Lifetime Value (CLV) — the total amount of money a customer spends with your store across all their orders.
By understanding customers better, you get better at cross-selling and up-selling, giving you a much better chance to win new sales from your existing Shopify customers.
Understanding your customers
A CRM is a fantastic tool for storing customer details and purchase history. The more you understand your customers, the better you can target their interests, leading to more sales.
Increasing accountability
A CRM lets you see all your customer data in one place: core customer information (name, address, etc.), order history, tasks, and any third-party data.
Better internal communications
A CRM keeps you and your team literally on the same page. When everyone has the same information, they communicate better with customers and amongst themselves. This also ensures that anyone on your team can take over a client relationship at a moment’s notice.
Automation of admin tasks
Having you and your team focus on sales is the most important aspect of your business. A CRM helps automate small admin and data entry tasks that can sap vital time and lead to context switching and lost productivity.
Cost savings
The initial cost and time to set up a CRM is an investment, but the return can be astounding over time. It grows your top line through better targeting and service to new customers, and upsells and cross-sells to existing customers. Having a CRM you can set up quickly, like you can with Airtable, makes it even better.
The CRM software landscape is vast, with hundreds of products competing to be the best. Some even integrate with Shopify directly, though often crudely. While not a CRM-specific tool, Airtable is a fantastic candidate for the job.
A CRM is fundamentally a customer database, task tracker, and analytics tool — and Airtable excels in all these areas. Its customizability lets you quickly create the right CRM for your business, rather than fitting your business into how existing CRM software works. It’s no surprise that Airtable is frequently used as a CRM system, task management system, and an analytics tool. No overhead and full customizability — what could be better?
Let’s get into the details. Many AirPower clients use our Airtable-Shopify integration to build a Shopify CRM. We’ve learned a lot from working with and listening to our clients about their CRM buildouts and goals. In this guide we’ll share best practices for setting up and using Airtable as a Shopify CRM.
The most important CRM ingredient is customer and sales data, so let’s get that flowing. First, add the AirPower app to your Shopify store. Next, set up the Airtable base you want to sync data to. If you don’t have a base already set up, take a look at our pre-made template bases.
With the app in your store and your base set up, make sure the necessary data for a CRM is configured to sync. You’ll need at least Customer, Order, Order Line Item, Products, and Variants data. This is easy to set up, but if you need help just send us a note.
Now comes the fun part. With data flowing, we can focus on using your new Airtable CRM. Below are the core CRM use cases we see our clients using and how to get them up and running.
Airtable’s table linking functionality makes calculating Customer Lifetime Value almost trivial — and if you used one of our base templates, it’s already done for you. Just make sure the table storing your Customer data is linked to the table storing your Order data. With this link active, go to your Customer table and create a rollup column to SUM the total dollar amounts of the orders associated with each customer.


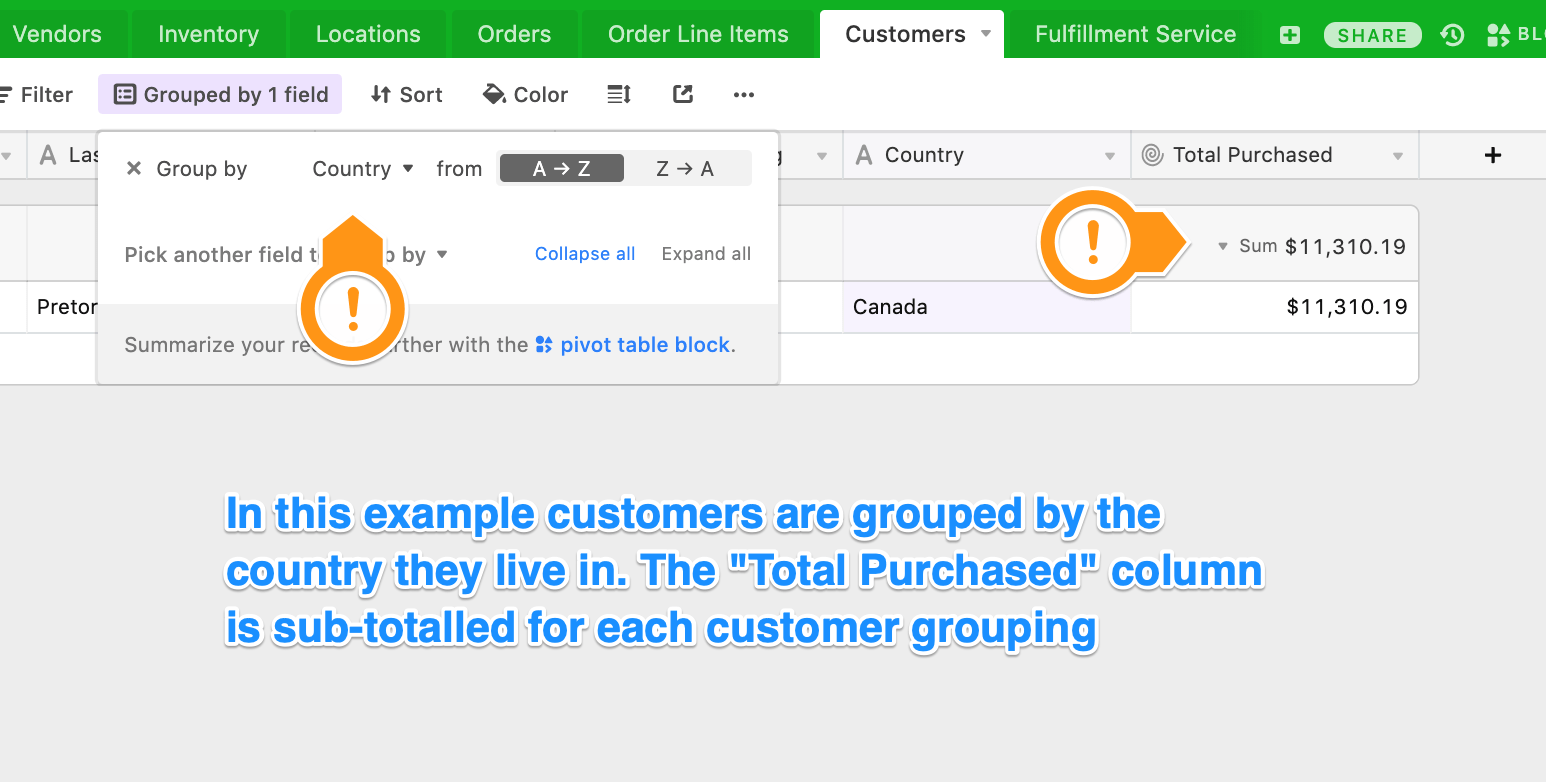
Once your customer data is in Airtable, you can start segmenting customers to determine the CLV for each segment. Use Airtable’s powerful grouping functionality by finding the column you want to segment by and grouping your data by that value. Airtable will automatically calculate the total amount purchased for each group. You can also filter the grouped data — for example, removing customers with fewer than two orders.
With grouping and filtering, Airtable gives you two powerful tools to slice and dice your customer data to find the customer segments that are most or least profitable, have the largest basket size, place the most orders, and more.
Set up your Airtable CRM so the table storing your product data is linked to the table storing your order data. Then, create a rollup column in the products table that sums all the order amounts for orders associated with each product. This is similar to what you did for customers above. This column will show the total amount sold of each product. Sort this column in ascending or descending order to see your least or best selling products respectively.
Set up AirPower to sync the “vendor” value of each order line item into the table that stores your order line items. Now, do one of the following:
Set up AirPower to sync the “fulfillment_status” order field to your Airtable base. Then, go to the table that stores your orders and filter the column that has your fulfillment status to “unfulfilled” or “partial”.
With all your customer data in one place, you can easily extract the information necessary to create a mailing campaign. Use Airtable’s filtering capability to narrow down your customer list to match the criteria you need. For example, you may want to email customers who haven’t placed an order in the last six months.
Once you’ve filtered your customer data, export it to CSV and import the CSV file into your email marketing system of choice (like Mailchimp).
Use Airtable’s “DATETIME_FORMAT” formula (see here for details). Add a new column to the table holding your orders data and use the DATETIME_FORMAT formula to extract just the month name into the new column (format “MMMM”). This new column will now contain the name of the month the order took place, which you can then filter or group by as needed to produce a monthly sales report.
Expanding your Airtable-based Shopify CRM to suit your needs is one of the key advantages to using Airtable over a traditional CRM product (aside from being more affordable). Here’s how to add team tasks to your CRM.
Add a “Tasks” table to your Airtable base. Each row can be a task, and you can set it up to contain all the data your tasks need. Also add a column of the “Collaborator” type. If you add a fellow Airtable user to this column, they’ll be notified by email of new tasks assigned to them.
Now link the “Tasks” table to your “Orders” or “Customers” tables as needed. To add a task to an order or customer, just add a new linked task. You can do this manually, or use a tool like Zapier to automatically add tasks when, for example, a new order row is added to the orders table.
This guide is ever-growing content. We add new CRM use cases as we learn about them from our clients. Keep checking in from time to time to see what’s new, and if we’re missing some way Airtable can help Shopify stores as a CRM, please let us know by dropping us a line!